bike review, bike setup, bikes, Fuji, Pursuit Bike, technical, track, track bike, track bike setup, track bikes, Track Elite
JT
0 Comments
220 Views
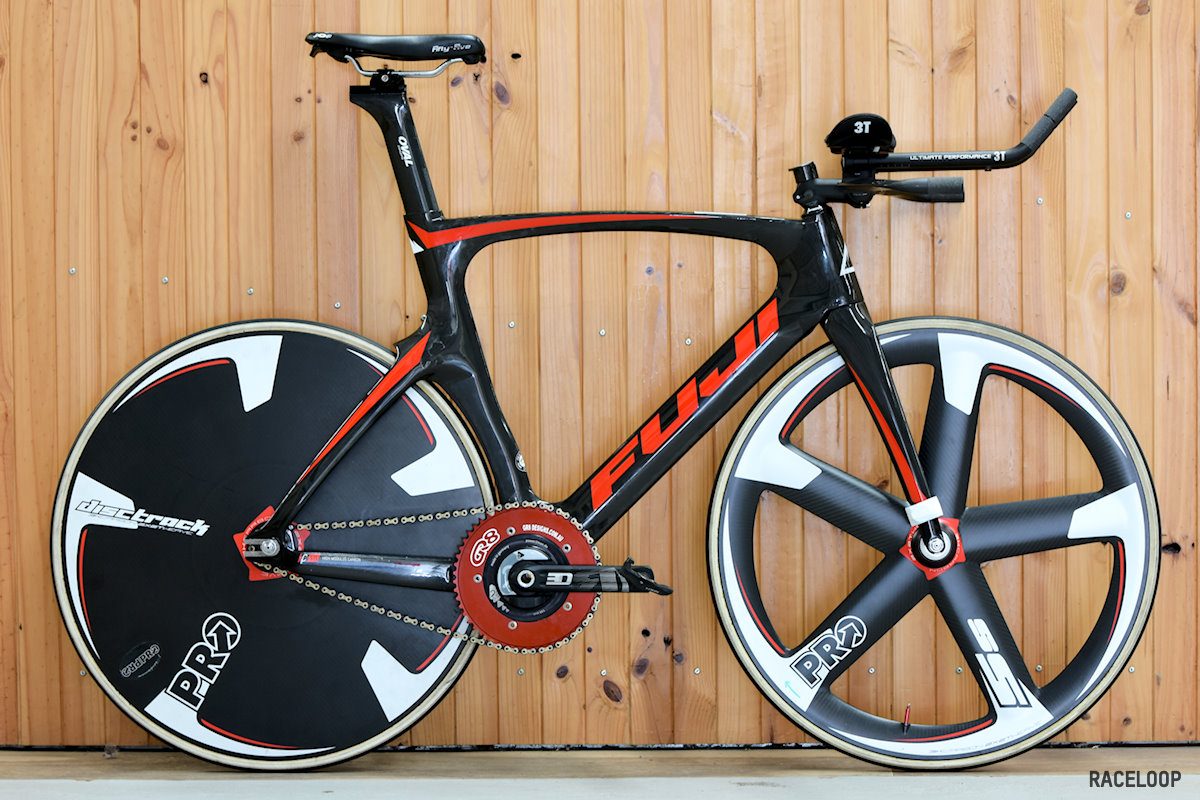
Fuji Track Elite Individual Pursuit Setup
Personally my favourite event is the Individual Pursuit – a time trial ridden over distances between two and four kilometres (depending on category). It’s a highly technical event that requires a well developed anaerobic capacity coupled with a high level of aerobic capacity, technical skill and excellent aerodynamics. To do well, riders look to optimise every bit of their performance to squeeze out every last split second.
In this article I talk about how I have gone about setting up my Fuji Track Elite for racing the pursuit. Although I’ve given consideration to the aerodynamics of the equipment, the body’s position on the bike creates greater than 90% of the aerodynamic drag so I have spent considerable time improving this aspect of the setup. With this in mind, although I have thought about the aerodynamic features of the bike (every bit helps), my main concern has been about improving my position on the bike so as to reduce frontal area whilst staying strong and holding position.
Depending on the air pressure inside the velodrome, I usually run a 54×14 gear which is just under 101 gear inches. If the air pressure is a bit higher, I’ll run a 53×14 (99 inches). Around 1000 hPa is low, and I consider anything over about 1025-1030 as time to start thinking about a new gear. The difference between 1000 and 1030 equates to about 0.15 seconds per lap. It might not seem like much but that’s over a 1 second a kilometre which is massive difference in a pursuit.
The effects of aerodynamic wheels can be considerable and for an event like the pursuit they are mandatory. The PRO disc and 5 spoke are a beautiful set of smooth running carbon monocoque aero wheels. They are strong, incredibly stiff and very well made – Dura Ace quality. The rear disc has a lenticular design like the HED or Mavic models whilst the blades of the front 5 spoke have a thicker leading edge for aerodynamics. Despite the steep banking of DISC (one of Melbourne’s two indoor velodromes) and the forces associated with riding at speed in the bends, these wheels maintain a very rigid direct feel with no noticeable flex – even when sprinting in the bunch at 60+ km/h.
Although not ideal, the 5 spoke is a nice all round setup. For most races I don’t have the luxury of running a seperate front disc however for big races I have access to a Mavic Comete disc which I would use (without question). I’ve opted for the 5 spoke which is still aerodynamic but can also be used in bunch races. Although the most aerodynamic option, a front disc would alter the handling of the bike too much to make it feasible for bunch races so I use something a bit more versatile.
To give some context behind the benefits of a double disc setup. When Bridie O’Donnell started her UCI World Hour Record preparations last year she started off riding Zipp 808s – a well known aerodynamic wheelset. When she switched to a double disc set up (Mavic Comete), according to her coaches she instantly shaved off 0.5 secs from her laps times. For an pursuit set over 8 – 16 laps that is often decided by split seconds, double discs are worth considering.
It is not uncommon for new wheels to be slightly unbalanced once they are glued with new tyres. Unbalanced wheels can cause the bike to shudder at speed so both of the wheels have been balanced using small lead weights cut from small pieces of roofing lead sheet. Balancing the wheels is a fairly simple process that keeps the handling of the bike more consistent and stable at speed. This helps if you want to stick to the black line.
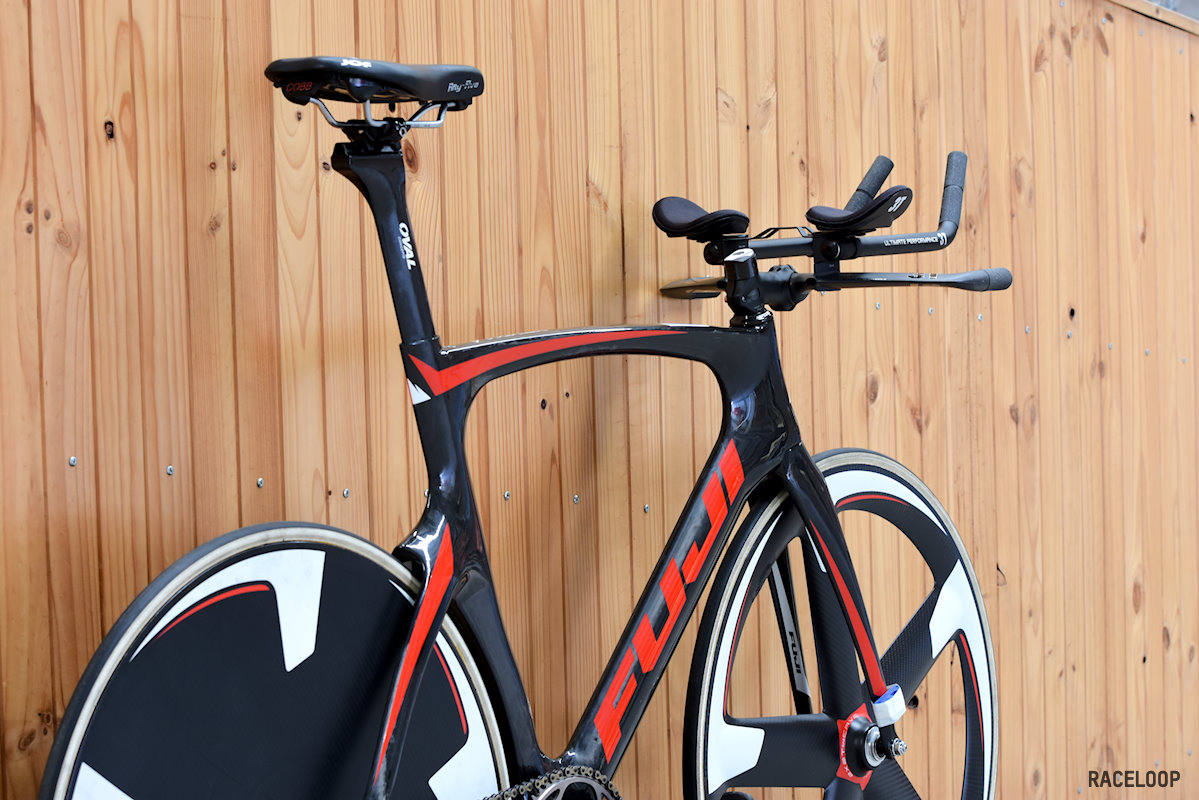
The seat is positioned as far forward as legally allowed according to the UCI rules. When I am training for the pursuit, as a constant I run this same forward position for consistency between my pursuit and regular bunch positions. The only thing that changes is the cockpit of the bike. The nature of track racing, the pursuit in particular, sees a high demand for VO2max intensity work. Given that I am aiming to maintain a very low aerodynamic position, this seat position allows me to open my hip angle up whilst helping to allow me to breath properly. With this setup, I have found no drop in power output between this position and my bunch racing position.
To help support a lower and more horizontal torso position, I have moved the saddle forward to help maintain an “open” torso to femur angle. There are multiple bodies of research which support this by suggesting that the cardiovascular stress for a given power output may be decreased by increasing the angle between the upper leg (femur) and the torso – or in other words, pushing the saddle forward. (Heil et al, 1995) From my observations and discussions with others, it seems that many riders share this view. I have certainly found that this saddle position helps to prevent my legs from hitting my chest as I get lower without any subsequent loss in power.
I am not training for the pursuit all year and I don’t run this extreme forward setup for general bunch racing when I am not training for the pursuit. I have found it moves too much weight over the front wheel which negatively changes the handling of the bike whilst moving the weight off my arms. To maintain saddle height, I lower the saddle as I move it back and vice versa.
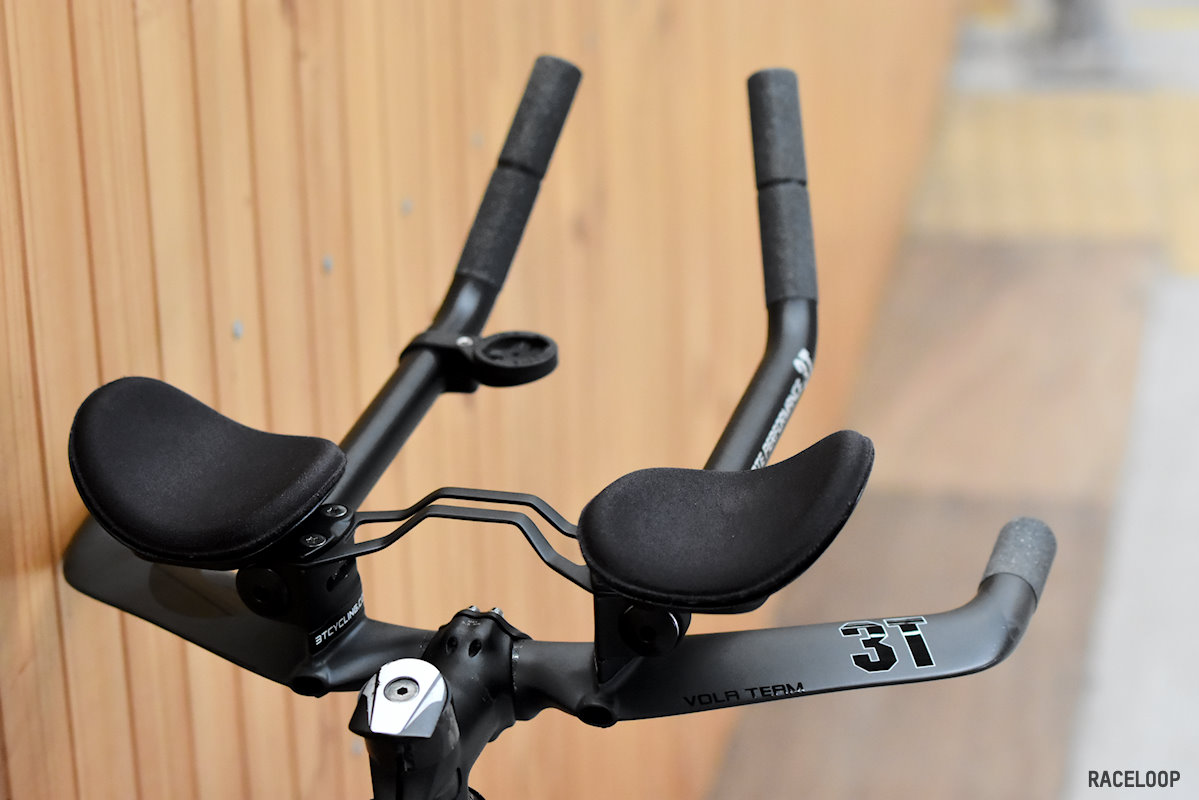
The 3T Vola bars are a nice set up. They are narrow and the extra stiffness provided by the supporting brace is noticeable. The TT bars have been set with a medium width so that my arms don’t protrude past my torso and hips whilst still not restricting my breathing. Although narrow elbows are an important part of an aerodynamic position, there have been other considerations when setting up the pads. Specifically, this solid wide base is important for two key reasons.
Firstly, having a more stable base of support assists with torso stability which is important for riding at the intensity ridden at during a pursuit or a time trial race. Secondly, the steep 42 degree banking at DISC produces some noticeable G-forces so it is easier to stabilise torso mass with a slightly wider stance with the lean on the inside elbow that occurs with the banking.
The frame reach of the Fuji is fairly short (as are most track bikes) but for pursuiting the reach of the frame works very well. The 80mm stem is short but I’ve set it up like this so it brings the bars pads back under the elbows. This sees my weight placed on my elbows which relaxes my upper body more whilst helping to flatten my back further. From an aerodynamic perspective, the flatter back is ideal as once the torso is horizontal it is difficult to improve or impair aerodynamic drag. Moreover, as my back flattens down to a position level with the ground, the magnitude of improvement gained from a narrow aero bar width is much less than what is achieved by adopting this horizontal torso position.
Note the Garmin mount on the aero bars? After some specific training I now have a good understanding of the relationship between my gearing, cadence and power. Working this out has been a crucial part of getting my pacing strategy under control. With this in mind, rather than work off power I switch to working purely off cadence which allows me to get the feeling for how the cadence “feels” at particular lap times. This is important as during competition riders are not allowed to have any sort of on bike computer.
For taller riders such as myself (187cm) the UCI’s bike setup regulations are very limiting. For racing any sort of championship event it is worth paying attention to these regulations as they are easy to break. In the pursuit position, the most difficult aspect of the rules is the reach of the aero bar extensions. I am almost certain these rules have not been devised by anyone with bike fit experience as many riders struggle with these rules. Watch this video for an explanation of the setup of a (road or track) time trial bike .
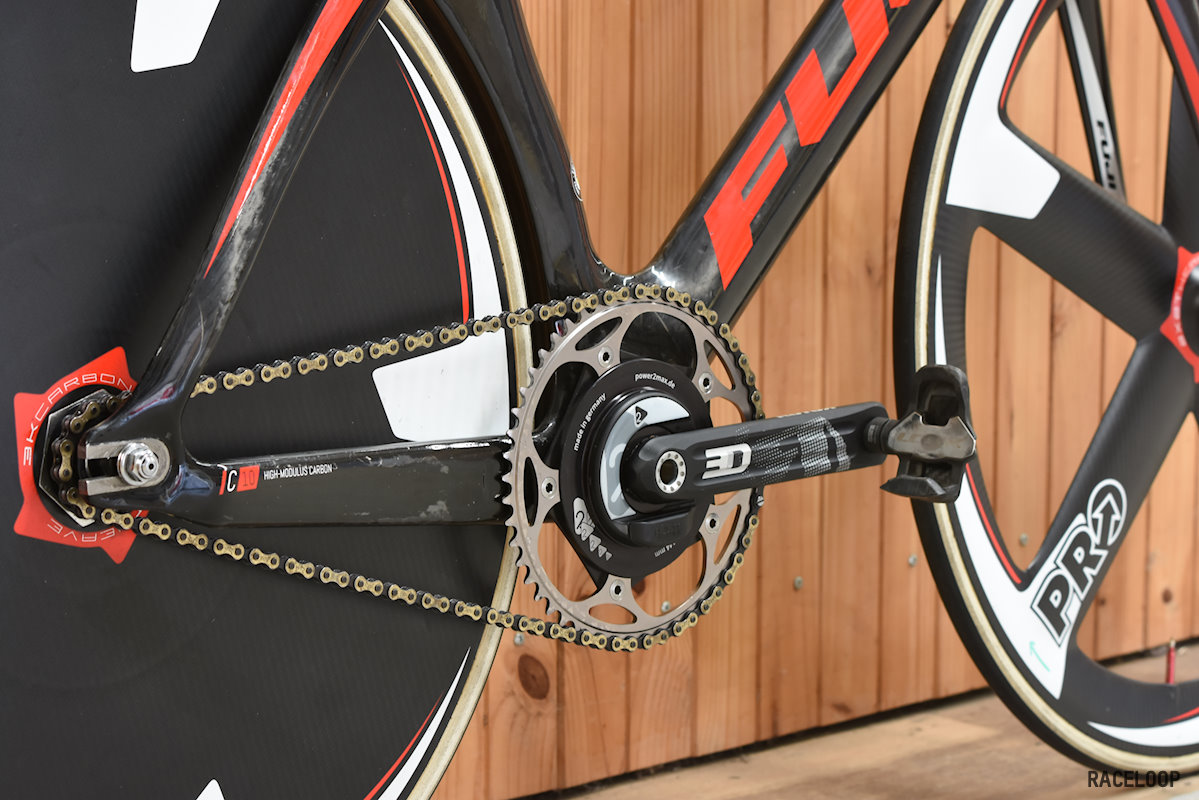
The power2Mmax power meter coupled with the Rotor 3D24 cranks is a nice setup and it is incredibly helpful in training. In hindsight, it would have been better to go with the 30 mm spindle as featured on the Flow, 3D+ and 3D30 crank as these models offer greater stiffness whilst being lighter. The BB options are also better. In reality, the 3D24 is a nice solid crankset. The guys at Adaptive HP swear by the power2Mmax power meter and after using another product and I am happy I took their advice and switched. The ANT+ connection has shown to be highly reliable and the data appears to be far more consistent although at the end of the day, all I am not to concerned with the accuracy as long as the data is consistent and relative to itself.
The Look Keo Blade 2 pedals are nice and simple with a smooth underside for better aerodynamics. The spring tension is set to 20NM which is the tightest they make. Although a good pedal, they are starting to develop play between the interface between the cleat and pedal platform. The Shimano platform appears to be far more resilient to developing this sloppiness between the pedal/cleat interface and I will switch to this platform in the near future. From my observations, the Shimano system the pedal platform of choice amongst most of the elite track cyclists.
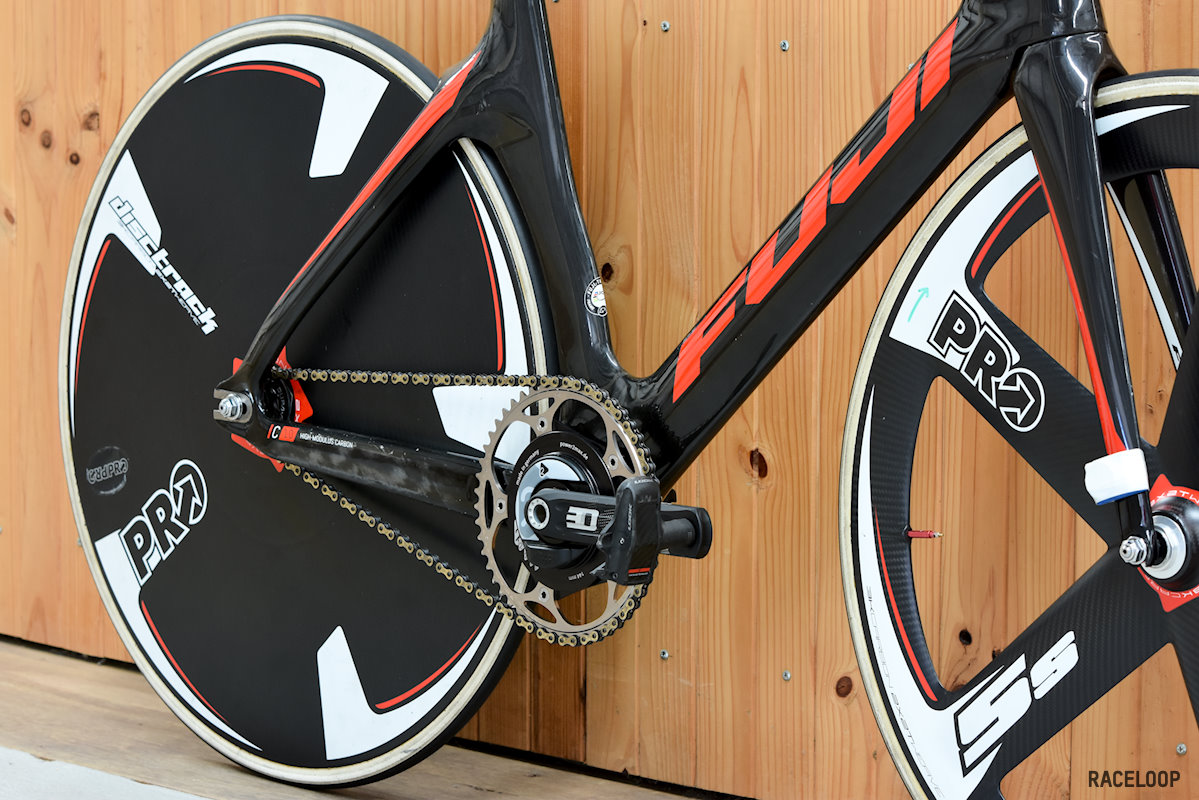
The frame hugs the back wheel nicely. Even with the rear wheel as far forward as possible, the wheel moves nicely through the frame. In fact, unlike some other aerodynamic frames there is plenty of room in there for a lenticular disc wheel such the PRO, Hed or Mavic. The frame also has plenty of room to fit the 22mm Vittoria Pista CL tyres. The reason I have not chosen narrower tyres is that this slightly wider size should smooth the transition of airflow between the tyre and thus, minimising drag. This is one of the reasons why the Australian national track team opt for wider tyres.
Be aware that I only run with the Pista CL tyres indoors on a wooden track. The tyres are incredibly supple and fast but they do not have any sort of puncture protection and they wear quickly. The tubes the Pista CL’s use are made from latex so they have very low rolling resistance.
For bunch racing I normally run the tyres at 190 psi (12.5 bar) however for pursuiting I run 215 psi (15 bar) which is at the top end of their rating. Running at this pressure feels amazing as it feels as if there is no rolling resistance what so ever.
The front red chainring is produced by Melbourne based machinist David Haase from GR8 Designs. It’s a solid aluminium CNC machined ring that has been nicely finished and maintains a good, clean chain line. In this picture you can see the chain ever so slightly sagging. I like to run a slightly loose chain as it’s just that little bit quicker. As the saying goes, “a loose chain is a fast chain”. Spin your rear wheel with a tight chain and see how long it spins for…
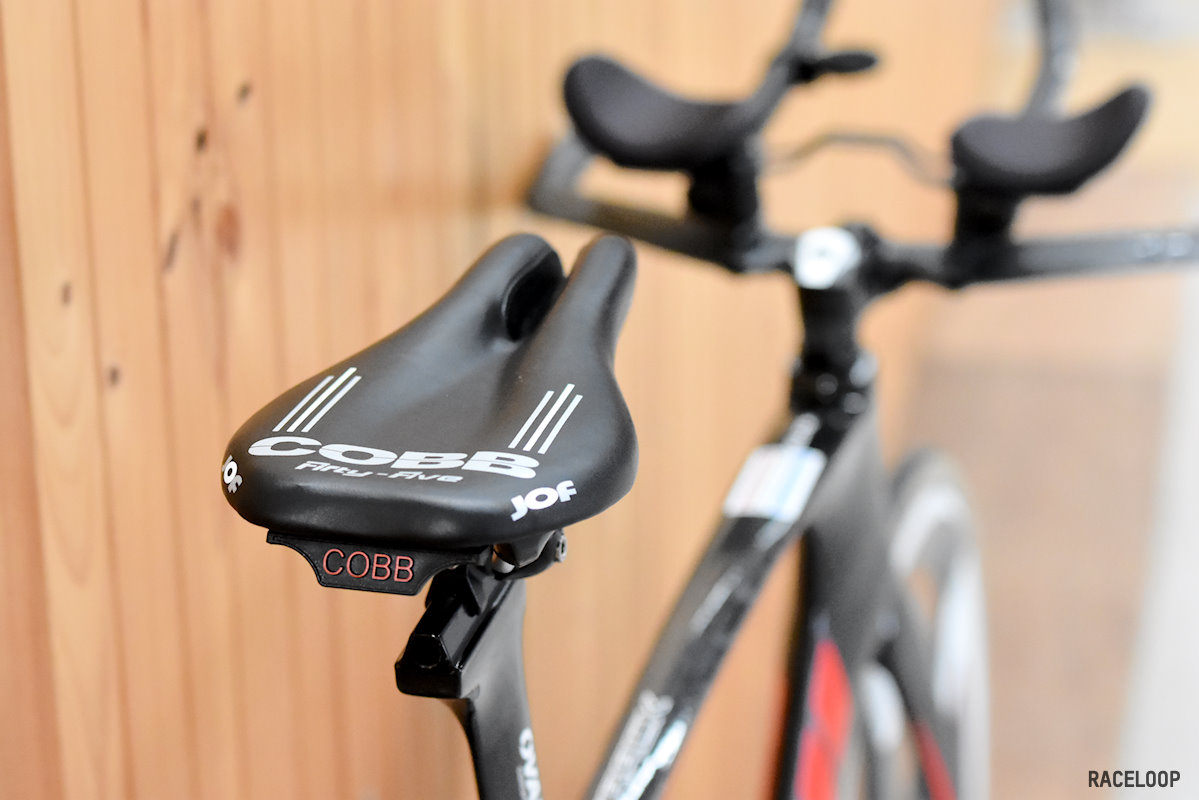
Because of the low position of my pursuit position saddle sores have been a big problem so I have installed Cobb saddle. Although it has an unusual design, I’ve tried several saddles and without doubt this saddle has been the best I’ve tried for relieving the pressure.
This saddle has been chosen after trying several other models. As a major interface between the body and the bike, I have struggled with saddle selection for track riding because of the extreme pressure created by the forward lean of the track bike position. Due to the nature of the cutout design, this saddle allows me to sit squarely in the centre of the saddle with less pressure whilst supporting a more even distribution of weight on the saddle. This is ideal as it has enhanced my bike position even further by enabling me to rotate my hips forward which I was not able to achieve previously.
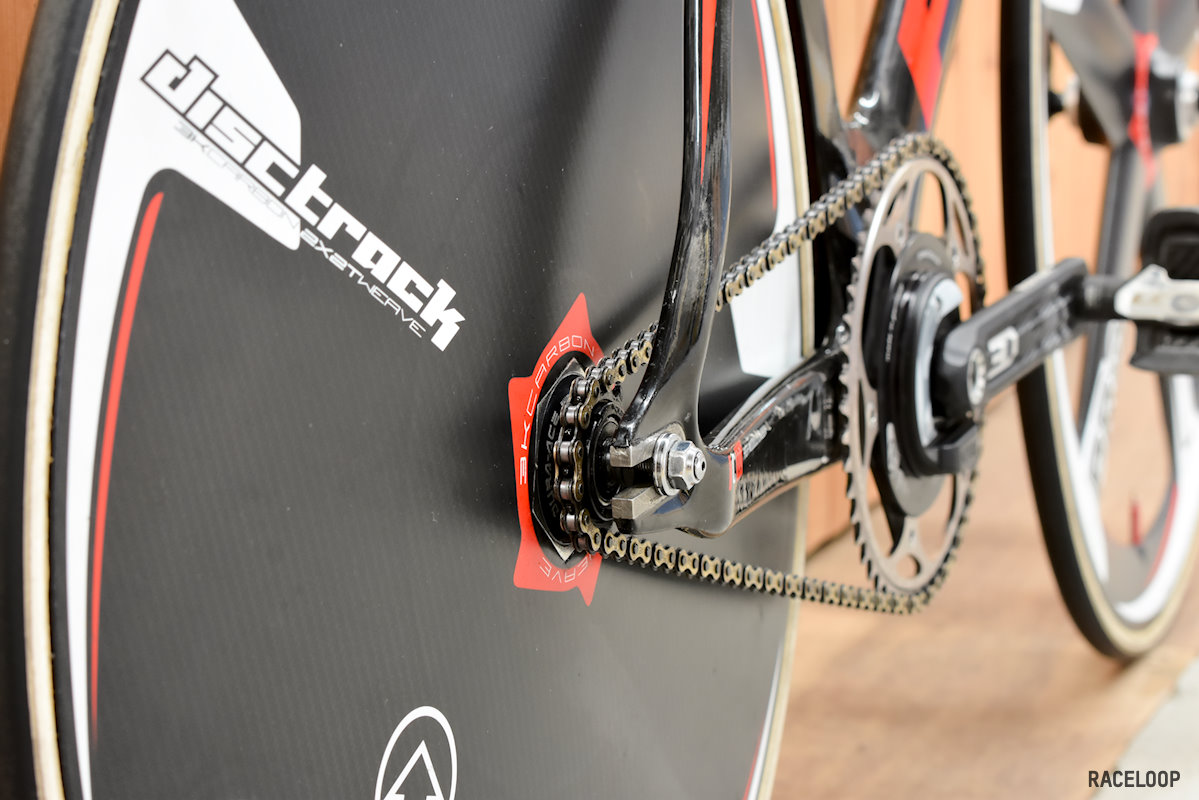
Although nothing to do with setup, notice the thickness of the rear dropouts? They are solid steel and after countless wheel changes they are still in near perfect condition after 18 months of use. The wheel continues to slide easily up and down the dropout and when the wheel nuts are tightened the wheel moves into the square centre position – they’re perfectly straight. There has been no deformation of the original dropout profile and I get the idea that the design team at Fuji really considered how this bike would be used under “real use” conditions. I’m not sure why many other carbon bike frames use aluminium dropouts with replaceable shims (or worse, no shims) instead of just using solid steel. Steel may weigh more but it is far more durable and weight is not an issue on the track – most high end bikes are so close to the minimum weight anyway.
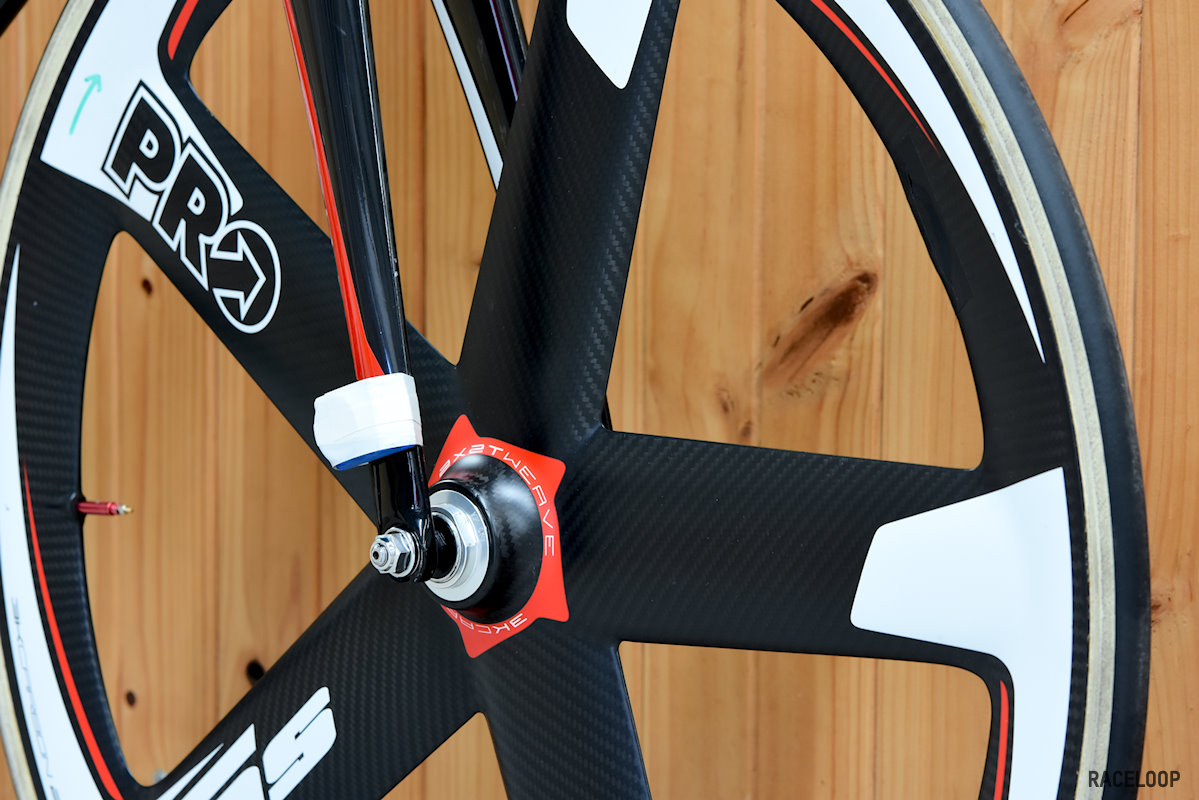
The blue transponder taped to the fork leg is a is part of a timing chip system that is available for recording lap times and splits – DISC has a high speed transponder timing system installed by Nathan from Metarace. Although unsuitable (read, inaccurate) for timing timed races on the track, for training it has been a life saver. This system has enabled me to train autonomously without the need for someone to help me with lap times. This has been critical for helping me to better understand the relationship between cadence and lap times. For pursuiting, understanding target lap times is a critical part of the pacing strategy used whilst racing. Without this information, top performance becomes difficult.
Notice the green arrow I’ve drawn on the wheel? The blades of the five spoke are teardrop shaped so it’s just a mental cue for when I am in a hurry. I’ve never needed it but just in case someone else puts the wheel in the bike. I drew the arrow in green so it really looks out of place – although it looks messy it’s hard to miss.
The setup of this bike has gone through several iterations in order to get it to this point. Starting from a position that was both too long, too high and too far back, Ken Ballhause from HP Tek has helped me to achieve a position that I was finding difficult to achieve on my own. A big part of this has been working on my hamstring flexibility which has enabled me to get lower and flatter on the bike. Although I still have further improvements to make, Ken’s suggestions have ultimately resulted in an improved position, better aerodynamics and faster times.
Feel free to ask questions or suggest corrections.
Share this content:
